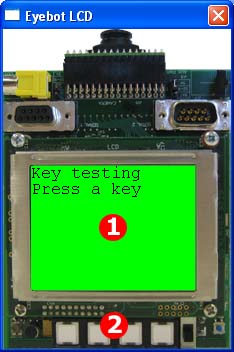
The EyebotPlugin extends SubSim with the Eyebot RoBIOS High-Level Functions. The plugin has a frame which represents the EyBot LCD with its keys.
Note: By now not all functions are properly implemented
The Eyebot LCD plugin simulates the physical interface of the Eyebot controller. The Eyebot API LCD functions print to the LCD screen. The four white buttons at the bottom of the Eyebot LCD can be clicked on with the mouse to simulate Eyebot key input.
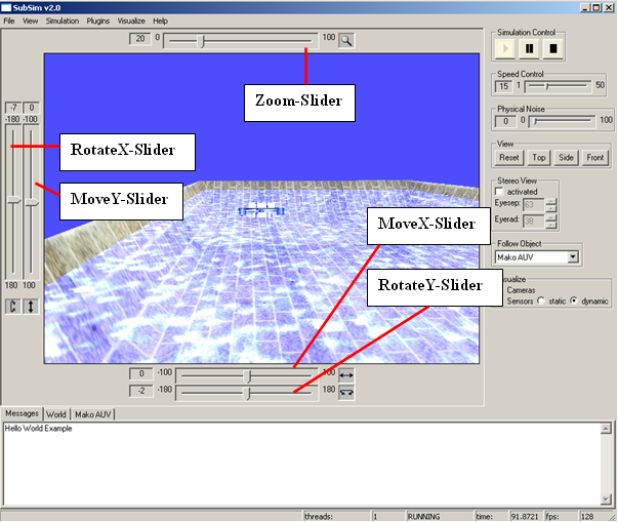
On the right side are all SubSim cameras listed in the format,
<object-name>:<camera-name>. Clicking on one of the cameras changes
the sceneview in the
plugin-canvas to the viewing angle of the selected camera.
Reload: It may occur that the plugin hasn't loaded the cameras correctly. This
occurs if
the plugin starts before SubSim parses all the camera entries. If this is the
case just
choose the reload entry and all cameras will be reloaded and displayed correctly
in the
list.
The debug panel provides help for people creating there own AUVs equipped with
cameras.

With this panel the choosen camera can be moved and rotated. The PosRatio and the RotRatio build a divisor for the Pos and Rot values. So if you have adjusted the camera in the way you wanna have it, you can calculate the values for the camera xml entry with <Position x="PosX/PosRatio" ... and the same way for the <Rotation ... values.
If you would like to see the position of the camera on the AUV, just enable
the
SubSim->visualize->camera menu entry. This allows you to watch the cameras
position on
the AUV on the SubSim window and the cameras view on the
plugin window, while you can adjust the camera on the AUV.
Example: /examples/examples-high/Camera
The Eyebot LCD-Plugin simulates the physical Eyebot surface, and show how the output on the real Eyebot controller would look like. It provides also the simulation of the Eyebot buttons that can be pressed with a mouse click.
Example: /examples/examples-high/Keys
