
This is a guide shows how to get started with SubSim and is recommended for all new users. You'll learn how to start and use the program as well running a simple simulation program.
For SubSim installation please have a look at the Installation Guide
To start SubSim click on the program Icon from the startmenu:
This will start the SubSim application without any World loaded.
To see SubSim in action just load one of the .sub files from the example directories. These contain all information SubSim needs to run a Simulation.
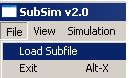
Another, much faster way is to choose the .sub file from the WindowsExplorer. Just doubleclick on the simulation file and SubSim starts with the chosen simulation loaded. Or you can use the drag and drop function of the WindowsExplorer, just drag the .sub file over the subsim.exe and drop it.

The SubSim user interface can be devided in five parts:
The world panel consists of a main window for the visualization surounded by sliders for camera navigation. The user's viewpoint is controlled by a virtual camera which is taking continuous pictures of the scene. The position, orientation and zoom of the camera can be controlled either by mouse, keyboard or GUI sliders.
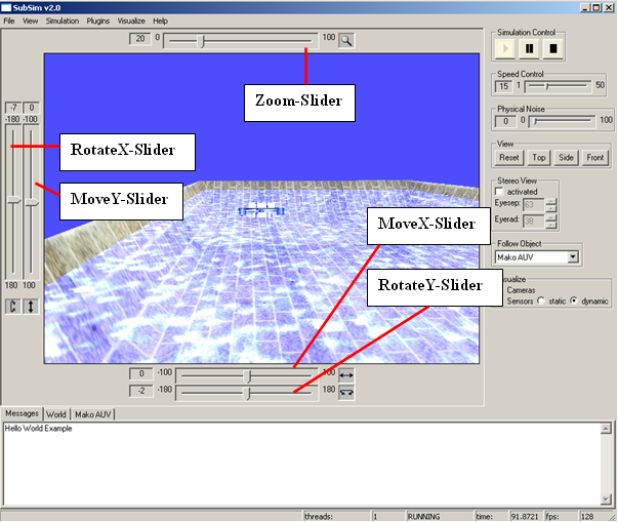
To move the camera, press and hold the left mouse button inside the main visualization window, while moving the mouse pointer across the screen. To perform rotation, press and hold the right mouse button and move mouse pointer. Use the mouse wheel for zooming.
The following table lists the keys for changeing the view. UP, DOWN, LEFT, and RIGHT refer to the arrow keys. The + sign means that the keys must be pressed at the same time
| Zoom Slider: Get closer to the object with the camera | SHIFT + CTRL + UP / SHIFT + CTRL + DOWN |
| Strafe Y: Move the camera in Y-direction (up and down) | UP / DOWN |
| Rotate Y: Rotate the scene around the Y-axis | CTRL + UP / CTRL + DOWN |
| Strafe X: Move the camera in X-direction (left and right) | LEFT / RIGHT |
| Rotate X: Rotate the scene around the X-axis | CTRL + LEFT / CTRL + RIGHT |
The controle panel consits of serveral parts to control the simulation or change visualization.
With the three buttons on the top you can start/pause/ and stop the simulation. Where as pause interrupts just the simulation, stop resets it as well.
The physic noise slider allows to adjust the noise of the physicsimulation
The simulation speed slider allows to deccelerate or accelerate the simulation. Be aware that slowing down or fasting up the execution may effects on the simulation result
The four view buttons allows to change the users viewpoint to front/top or side, or reset the view.
To make the camera following a certain object, choose one from the dropdown box.
Selecting the camera checkbox visualizes the cameras of all active objects.
Selecting the psd checkbox visualizes the PSDs of all active objects. You can choose between static or dynamic visualization. Where as the first one displays the PSD all the time, the second one only vizualizes the PSD if the client program reads from.
To change the view to 3D Analgryph image, check the SteroView box. WIth EyeSep and EyeAngle you can adjust the view.
The World page contains a table with information about the worldobjects name, position and orientation. Clicking in a cells allows to change the value and therefor the objects position/orientation.
This page holds information of an ative object. It contains a table with the HDT data. This can be manual or automatical updated for monitoring the values. If the objects hold cameras, you can view them on clicking thier buttons.
The main status bar (along the bottom of the main window) gives useful information about the status of the simulation. The status bar is divided into fields. The left-most field is for generic text and application messages. The field after "Threads" denotes the number of user programs currently running. The next field to the right shows the simulation status. This field will read either STOPPED, PAUSED, or RUNNING depending on the simulator state. The next field to the right shows the simulation time in seconds. The right-most field shows the frames-per-second render rate.

SubSim uses plugins to extend its functionality. This may even include the GUI interface. See the manual of the paricular Plugins for more information.
You may wish to try the SubSim Guide for further information and details.